CATEGORIES
- A free account
- Account assistants
- Account Information
- Affiliate Program
- Appearance
- AppSumo
- Audio & Video
- Branding / Custom / Whitelabel
- Branding Tool
- Break-out Rooms
- Call to Action
- Camera & Microphone
- Capacity & Limits
- Closed captioning
- Decisions - Professional Voting
- Event tokens
- Evergreen webinars
- Forms
- How to join meeting on mobiles
- Hubspot Integration
- Integrations
- Language interpretation
- Live Transcription
- Meetings & Webinars
- Other
- Pabbly Connect
- Paid Webinars
- Presence Manager
- Recording
- Registration
- Requirements
- Room Chat
- Screen Sharing
- Session Management
- Statistics & Reports
- Storage
- Streaming
- Sub-Accounts
- Tests & Surveys
- Virtual Backgrounds
- Vote Manager
- Waiting rooms
- Webinar and Meeting Room Features
- Website Presenter
- Whiteboard
- Wordpress plugin
FAQ -> Meetings & Webinars -> How to schedule a permanent room for your regular meetings?
How to schedule a permanent room for your regular meetings?
In LiveWebinar, you have the option of setting up several types of events. One of them are Permanent Rooms. Permanent rooms are perfect for organizing regular meetings, course sessions, etc. Set up once, they can be a permanent meeting place for the same group of people. Attendees need to be invited once and will join the sessions at the agreed time.
To create a permanent room, select the Events / Rooms tab in the navigation menu.

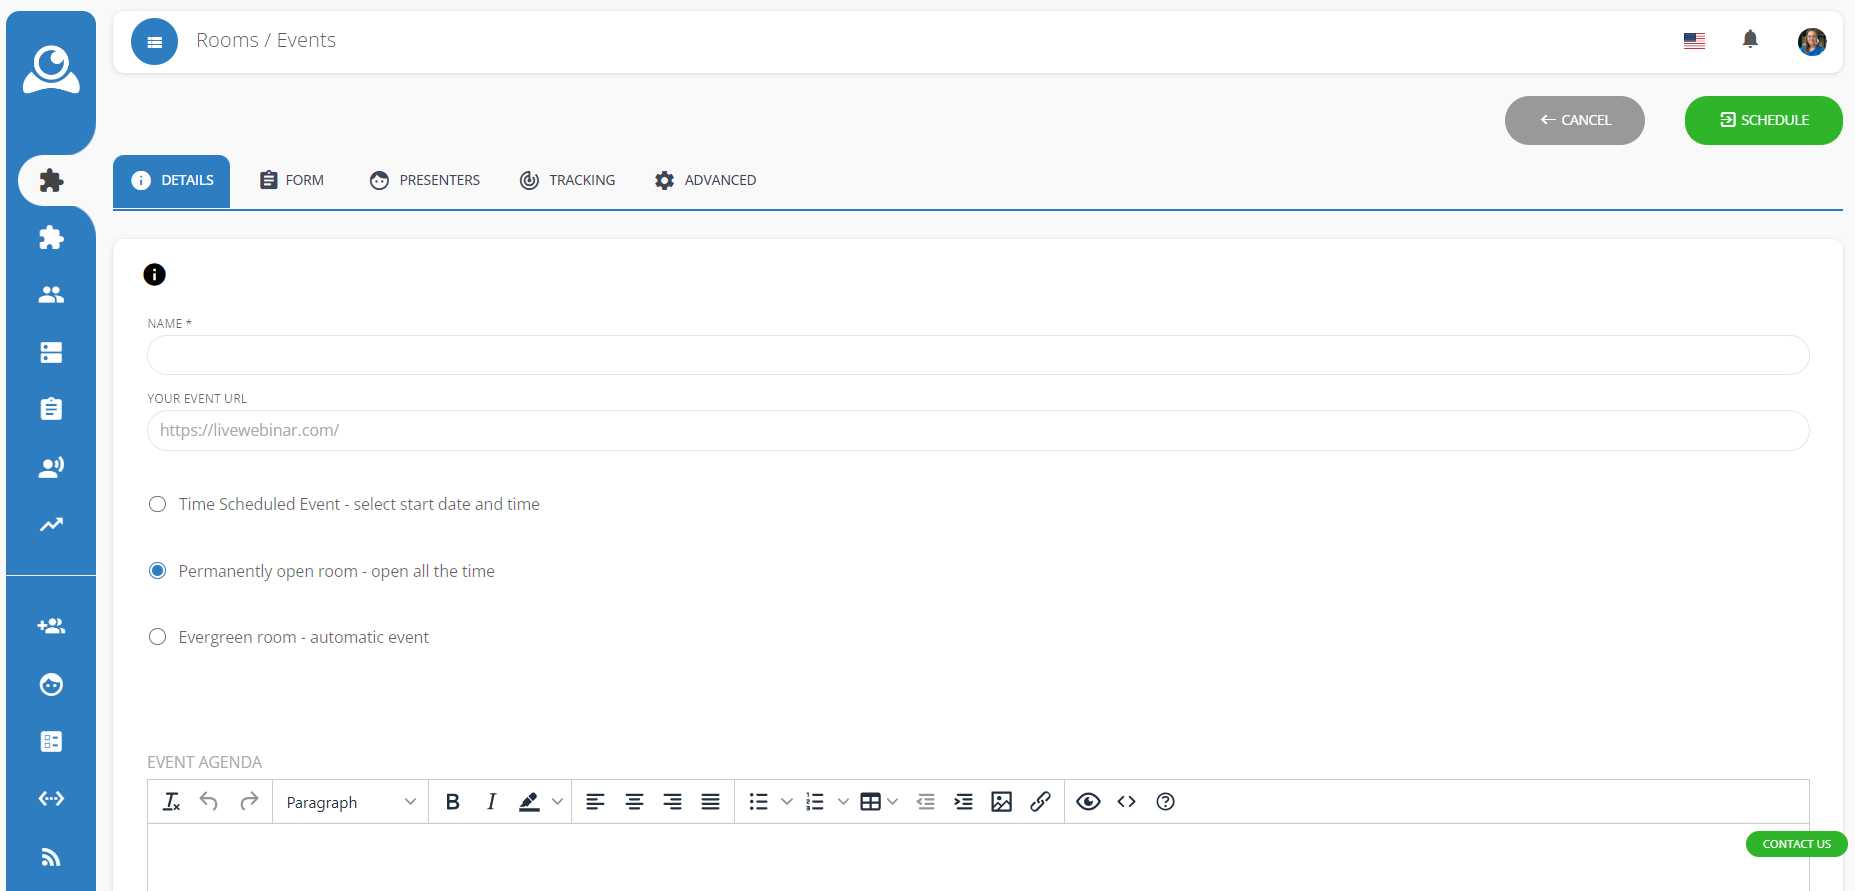
Then click "Schedule Permanent Room". Choose a name for your permanent room and the option for its availability. By default, you have the option "Permanently open room - open all the time" already selected.

At this stage, you can create an event by clicking "Schedule" or set additional parameters such as the meeting agenda, registration form, etc.
Permanent rooms are available only in LiveWebinar paid plans- BASIC, PLUS or BUSINESS. To make use of permanent rooms, please upgrade your plan here.