CATEGORIES
- A free account
- Account assistants
- Account Information
- Affiliate Program
- Appearance
- AppSumo
- Audio & Video
- Branding / Custom / Whitelabel
- Branding Tool
- Break-out Rooms
- Call to Action
- Camera & Microphone
- Capacity & Limits
- Closed captioning
- Decisions - Professional Voting
- Event tokens
- Evergreen webinars
- Forms
- How to join meeting on mobiles
- Hubspot Integration
- Integrations
- Language interpretation
- Live Transcription
- Meetings & Webinars
- Other
- Pabbly Connect
- Paid Webinars
- Presence Manager
- Recording
- Registration
- Requirements
- Room Chat
- Screen Sharing
- Session Management
- Statistics & Reports
- Storage
- Streaming
- Sub-Accounts
- Tests & Surveys
- Virtual Backgrounds
- Vote Manager
- Waiting rooms
- Webinar and Meeting Room Features
- Website Presenter
- Whiteboard
- Wordpress plugin
FAQ -> Recording -> How to record the webinar or meeting?
How to record the webinar or meeting?
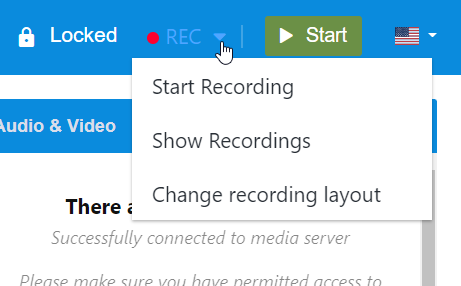
To start recording please click on the icon of “REC”. Be sure not to confuse this with the “Start” button which simply starts the meeting session.

Right of the “REC” button you’ll see a small arrow. When you click on it, three options will appear:
a) Start Recording – start or stop recording during a session
b) Show Recordings – go to the storage to find recordings
c) Change recording layout – change layout anytime during a session (8 layouts available)

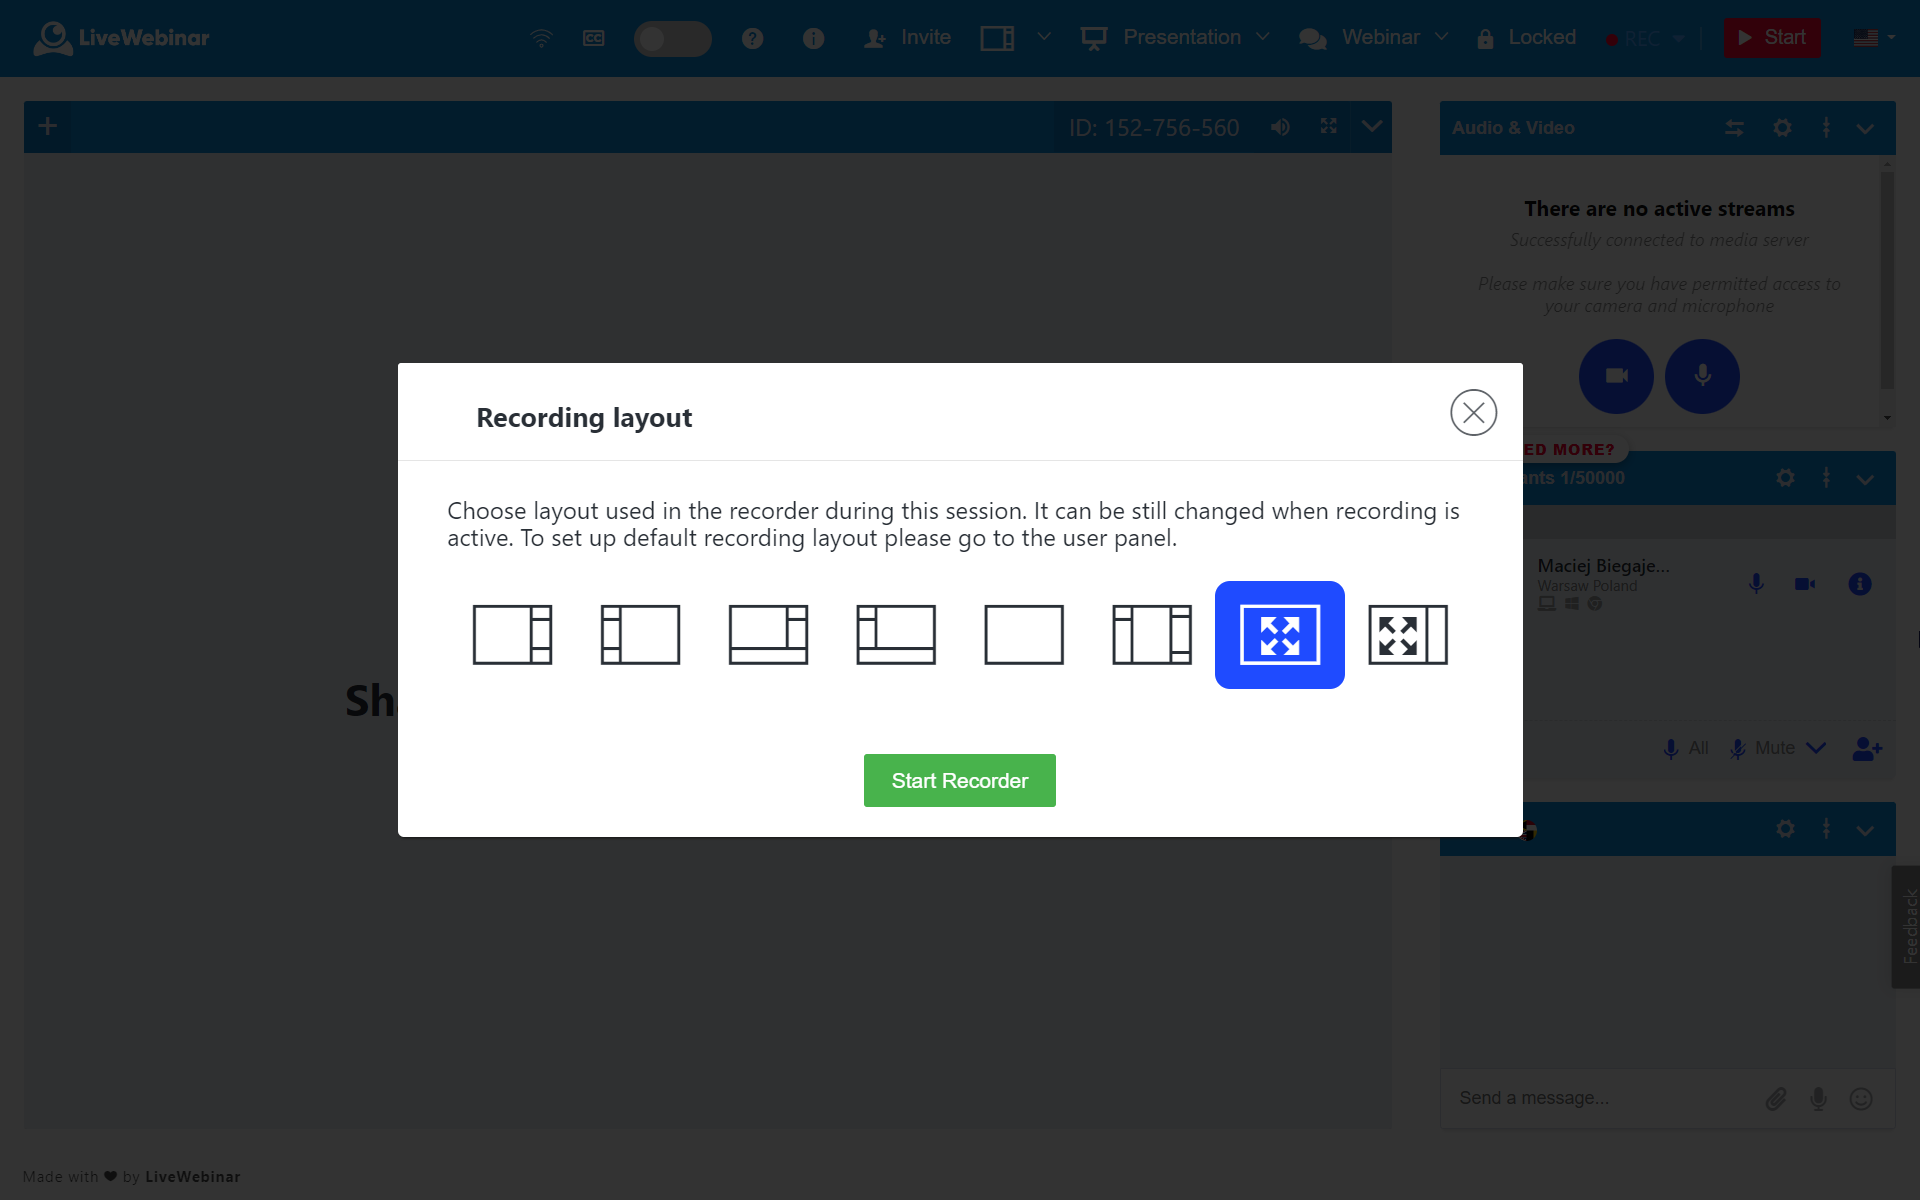
Recording Layout
It is possible to select the layout to be used in the recorder during a session by clicking on the “REC” option. The layout of your recording allows you to select the way your room is configured during your recording, i.e. you can choose where the chat feature will be or where the participant list will be displayed. You can also select a layout that will present the sharing portion of the screen in full size. It can be still changed when recording is active, and this modification will be visible in a final video. For creating Evergreen recordings, we recommend using the last two layouts selected on the picture below.

Recorder Room Role Setup
Your meeting is recorded in the default participant role, meaning that when you view your recording, you’ll be viewing it as a participant. However, white label and Custom users can adjust the recorder options to their needs if required (these changes can include modules, recorder roles and more). If necessary, we adjust the recorder to the client’s requirements.