CATEGORIES
- A free account
- Account assistants
- Account Information
- Affiliate Program
- Appearance
- AppSumo
- Audio & Video
- Branding / Custom / Whitelabel
- Branding Tool
- Break-out Rooms
- Call to Action
- Camera & Microphone
- Capacity & Limits
- Closed captioning
- Decisions - Professional Voting
- Event tokens
- Evergreen webinars
- Forms
- How to join meeting on mobiles
- Hubspot Integration
- Integrations
- Language interpretation
- Live Transcription
- Meetings & Webinars
- Other
- Pabbly Connect
- Paid Webinars
- Presence Manager
- Recording
- Registration
- Requirements
- Room Chat
- Screen Sharing
- Session Management
- Statistics & Reports
- Storage
- Streaming
- Sub-Accounts
- Tests & Surveys
- Virtual Backgrounds
- Vote Manager
- Waiting rooms
- Webinar and Meeting Room Features
- Website Presenter
- Whiteboard
- Wordpress plugin
FAQ -> Registration -> How to use One-click Registration link?
How to use One-click Registration link?
One-click registration links are an advanced way to allow people that are already on your mailing list to register for your webinar quickly. You can find it in the event creation panel under the "Registration" tab.
Click here to learn how to create an event.
Learn more about registration forms.
Configure One-click Registration link
To activate the instant registration option, you must select the "One-Click Registration Link" option after creating or assigning the registration form. This will make the link to use this feature active.
Copy the provided link to your email application (e.g. Mailchimp) and replace your own field labels with dynamic content.
The link for instant registration will look like this:
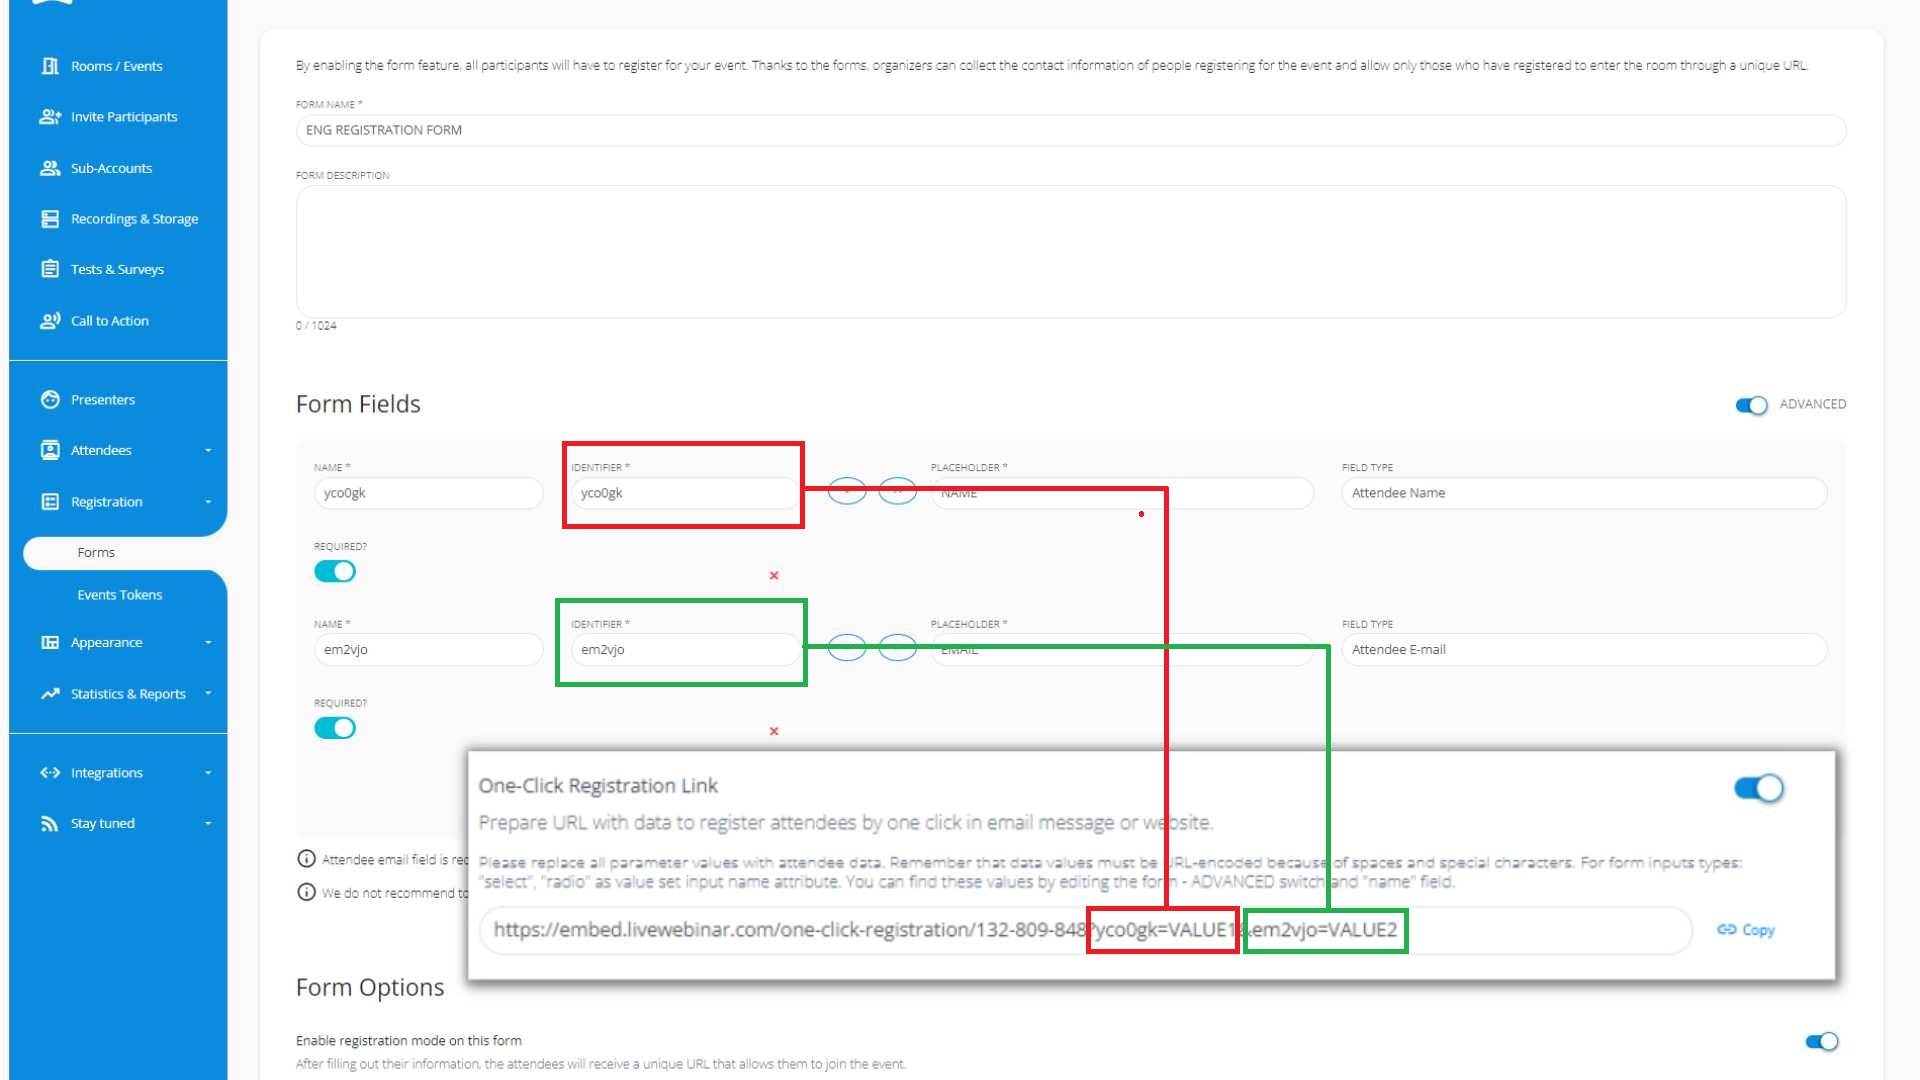
https://embed.livewebinar.com/one-click-registration/XXX-YYY-ZZZ?6f5pmc=VALUE1&9gmmyq=VALUE2
VALUE1 - dynamic content corresponding to field 1 in your registration form (in this case the participant's name)
VALUE2 - dynamic content corresponding to field 2 in your registration form (in this case the participant's email)
An example of a properly configured One-click Registration link for the Mailchimp tool:
https://embed.livewebinar.com/one-click-registration/xxx-yyy-zzz?6f5pmc=*%7CFNAME%7C*&9gmmyq=*%7CEMAIL%7C*
How can I find out which fields correspond to which dynamic content?
You can check it in the advanced settings of the form, Just check what name the field label has and find it in the link for instant registration. The name can be modified.

Where to get information on dynamic content in Mailchimp?
Information on dynamic content can be found here and here.
Here you will find the most important fields:
| First Name | *|FNAME|* |
| Last Name | *|LNAME|* |
| *|EMAIL|* | |
| Phone | *|PHONE|* |
Where to get information on dynamic content in ConvertKit?
Here you will find the most important fields:
An example of a properly configured One-click Registration link for the ConvertKit tool:
https://embed.livewebinar.com/one-click-registration/000-000-001?XXXXXX={{ subscriber.first_name }}&YYYYYYY={{ subscriber.email_address }}Remember to replace XXXXXX and YYYYY with the corresponding field IDs from your registration form settings
Here you will find the most important fields:
| First Name | {{ subscriber.first_name }} |
|
{{ subscriber.email_address }} |

